DUCO App
tutorial
Welcome to DUCO Spain & Portugal 2025!
This tutorial will provide essential information to guide you seamlessly through the app.
Click below, to find instructions on how to:
1. Download app to your device
DUCO App is available for download on both Apple and Android devices.
Click on the icons below to download.
Desktop version: click here
2. Login to your account
2.1
After downloading the DUCO App from the App Store or Google Play, locate the app icon on your home screen.
It should look like this.
2.2
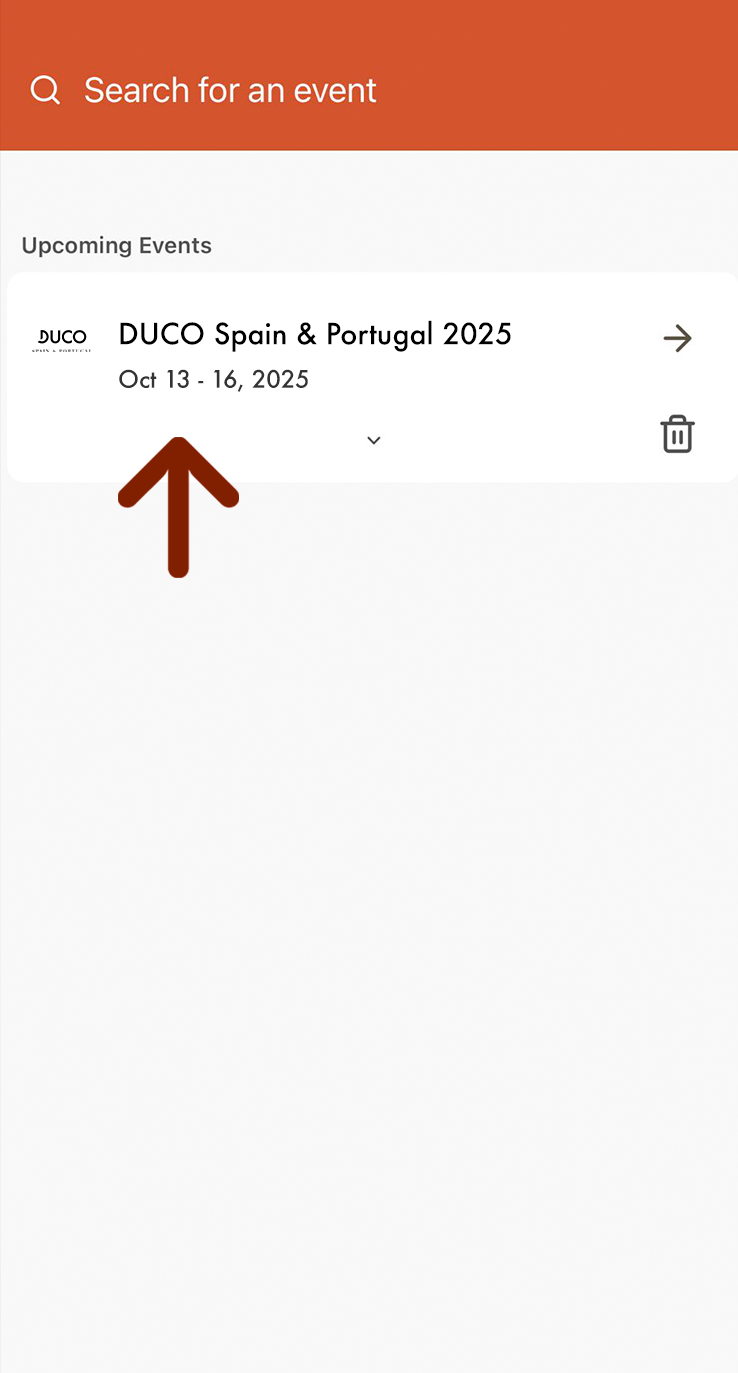
Once you open the app, you’ll be greeted by the DUCO welcome screen.
Simply click on the ‘DUCO Spain & Portugal 2025’ event to sign up.
2.3
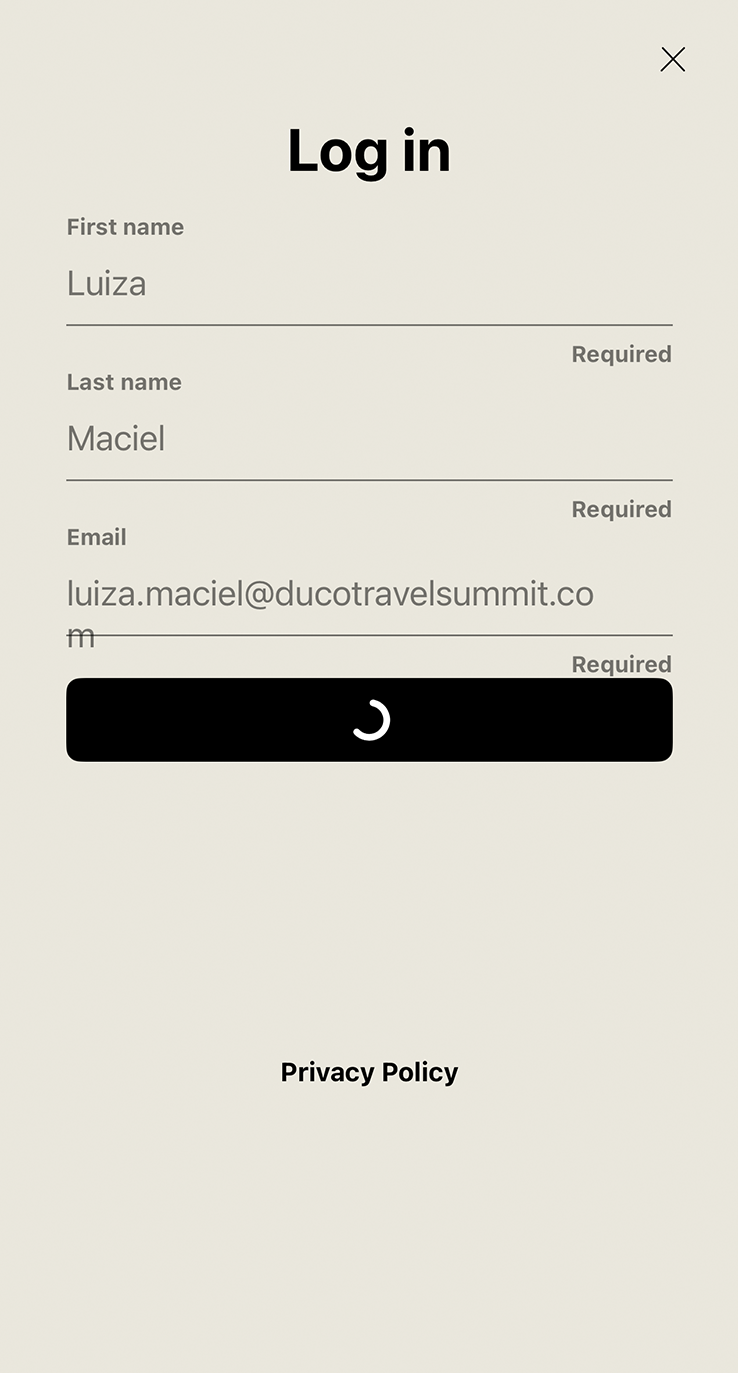
To log in, please fill in your ‘First Name’, ‘Last Name’, and ‘Email‘.
Important: Ensure you log in with the account provided to you by DUCO via email. Do not attempt to log in using an alternative email, as this will prevent access.
Click on the arrow to continue.
2.4
A verification code will be sent to your email.
The email should arrive within a few minutes. If you do not receive it, please check your spam or junk folder. If the issue persists, contact the DUCO Team for further assistance.
2.5
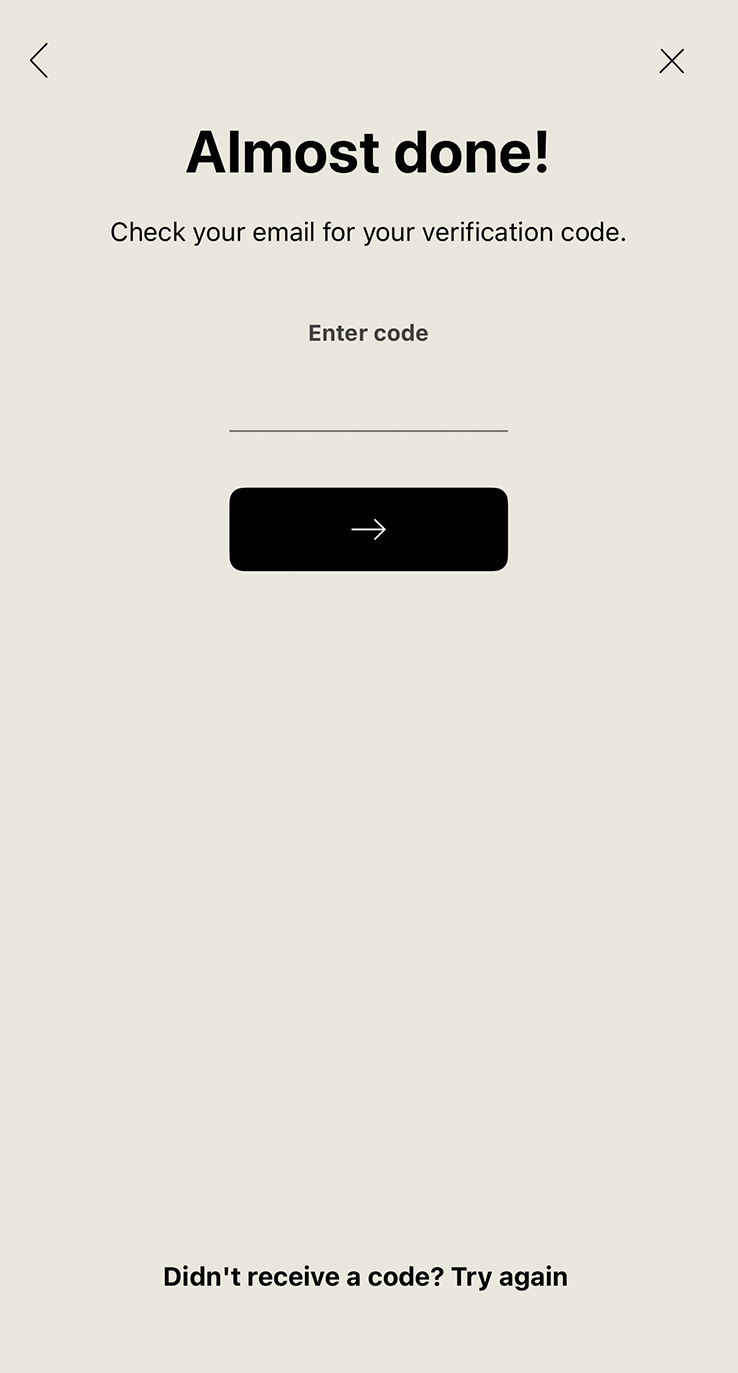
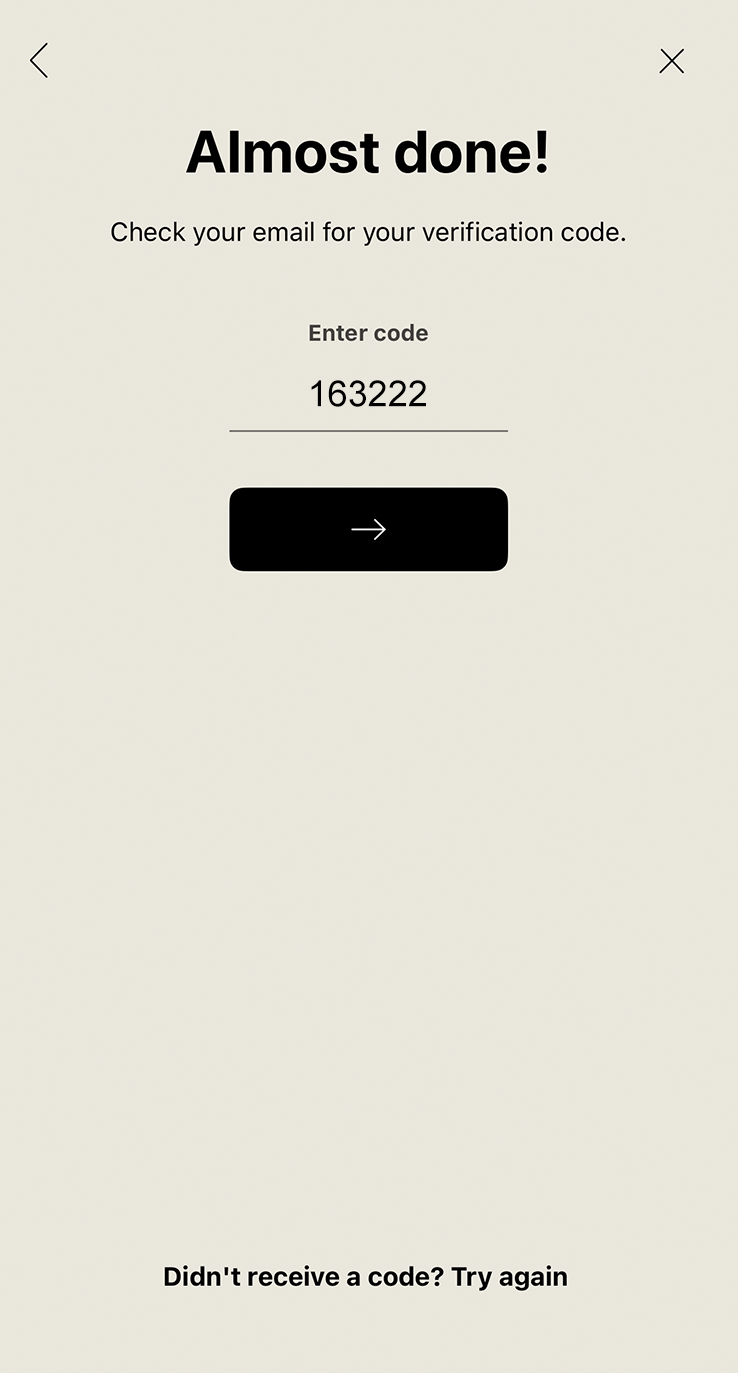
Please enter the code received via email. Click on the arrow to continue.
Note that the code displayed in the image on the side is for reference only; each code is unique to the individual.
2.6
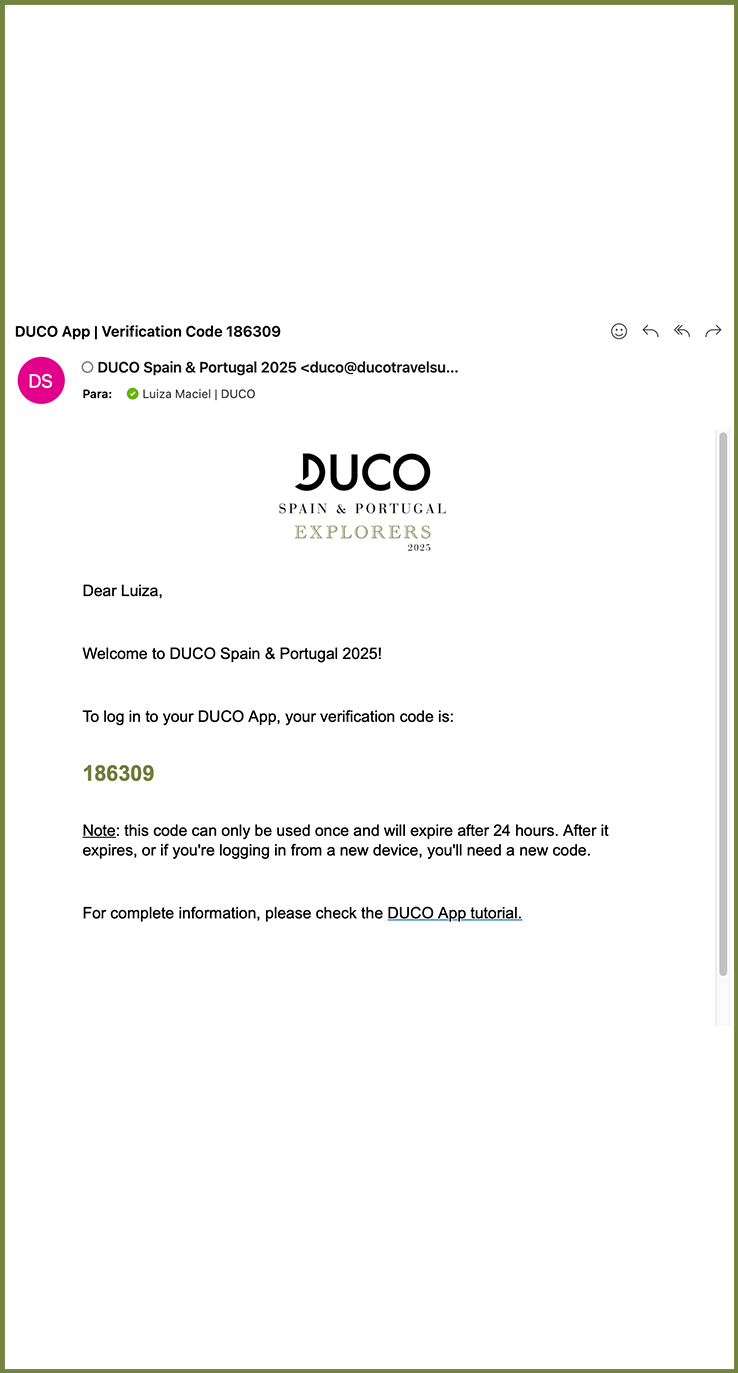
The verification code email should look something like this.
2.7
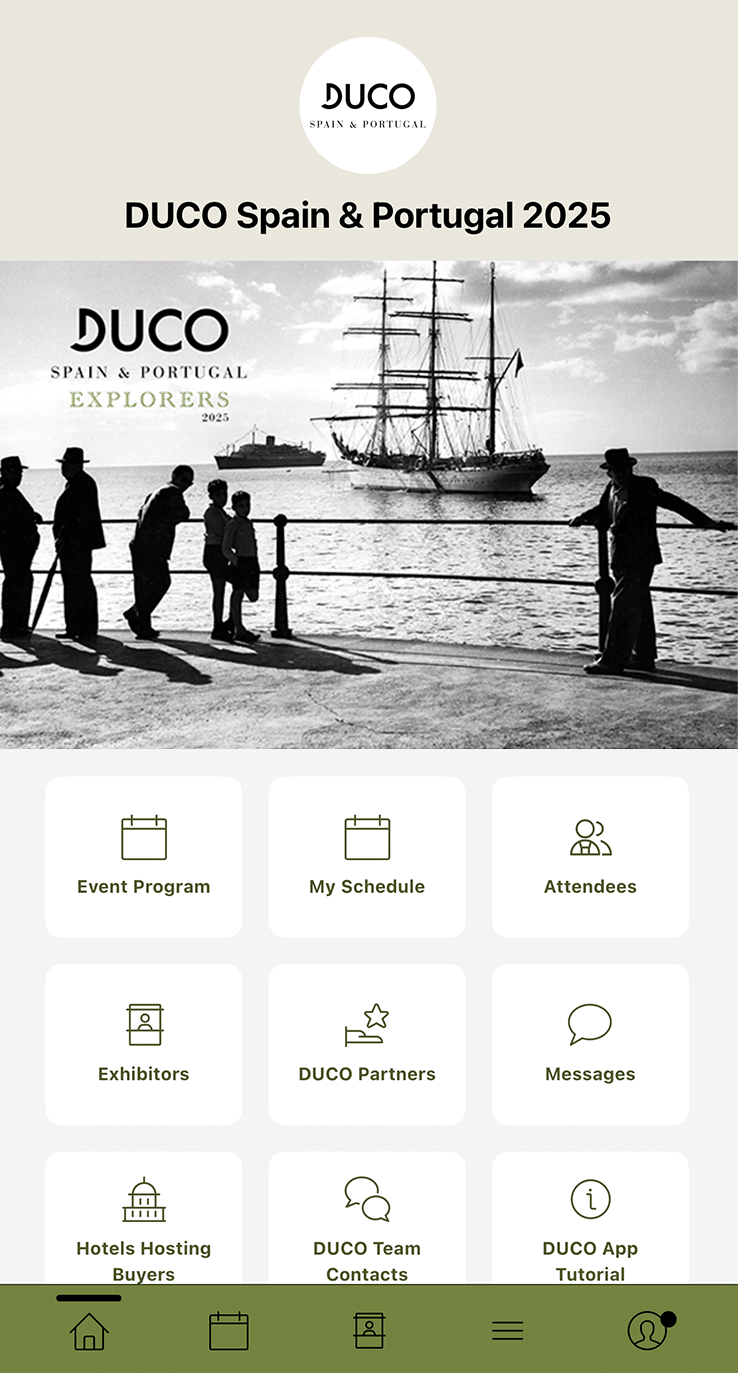
You are in!
After entering the code, you will be redirected to the event homepage, where you can find important information about the summit, check your agenda, make connections, exchange messages, and much more.
3. Enable notifications
3.1
Make sure to enable notifications to stay updated on important announcements, schedule changes, and event highlights throughout DUCO Spain & Portugal 2025!
3.2
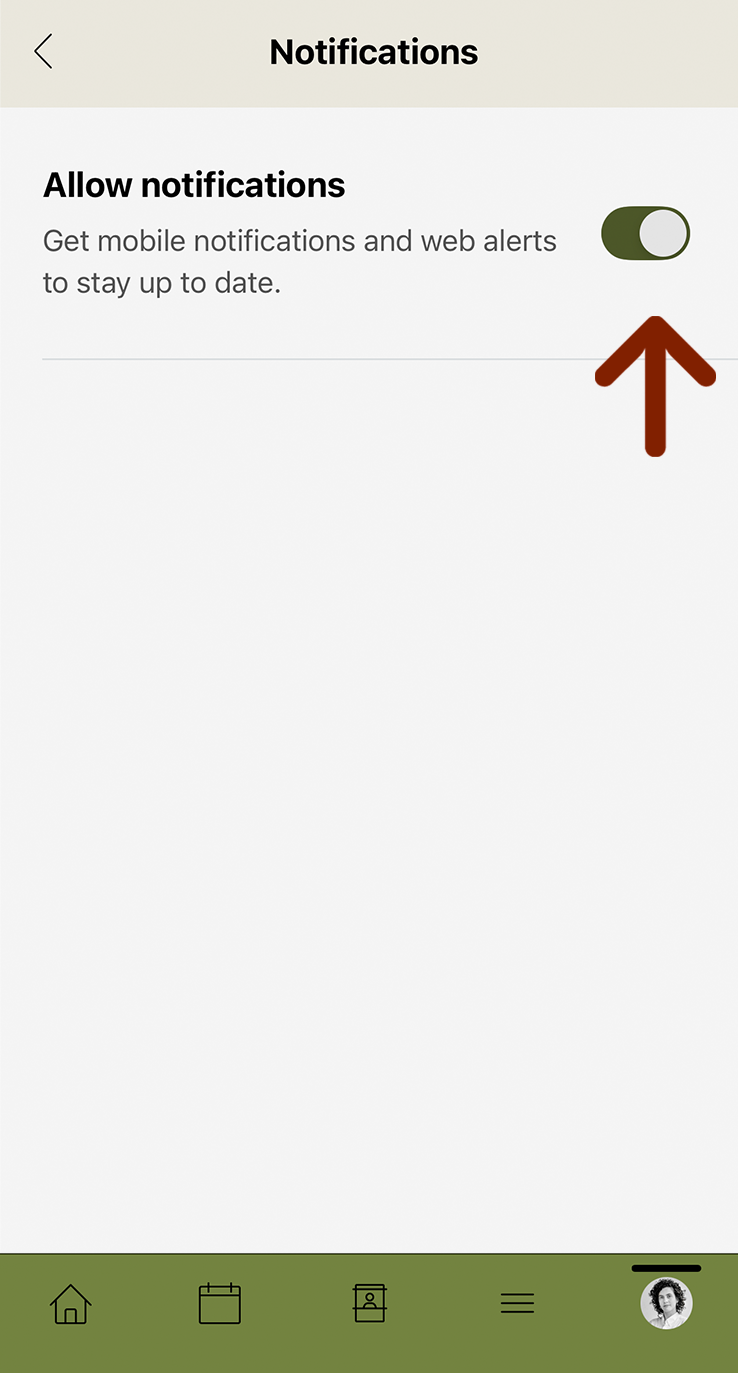
To change notification settings, click on the profile icon at the botton of your screen.
Then select ‘View Profile’, tap the gear icon (settings), choose ‘Notifications’, and finally enable ‘Allow Notifications’.
Click on the video on the side for a complete instructions.
4. Update your profile | Picture & Email
4.1
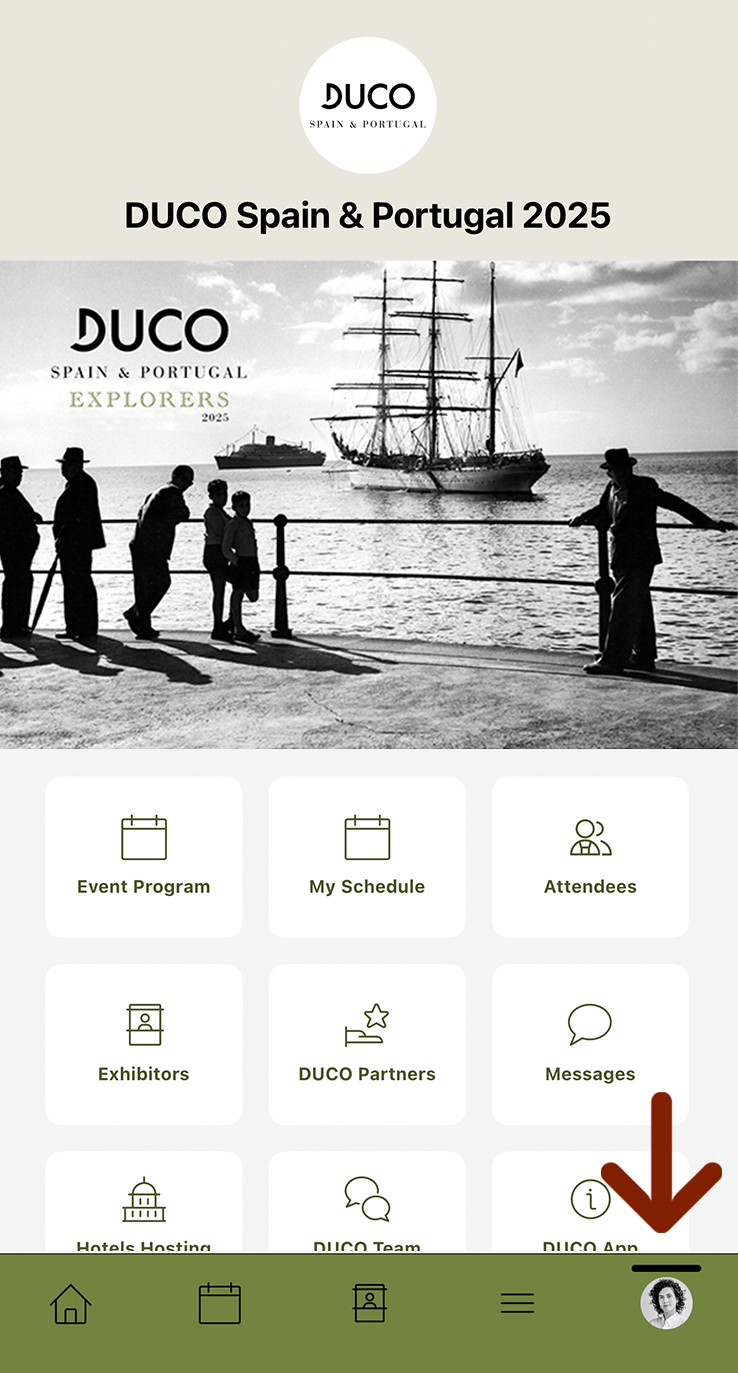
To update your profile picture, first click on your profile icon on the home screen.
4.2
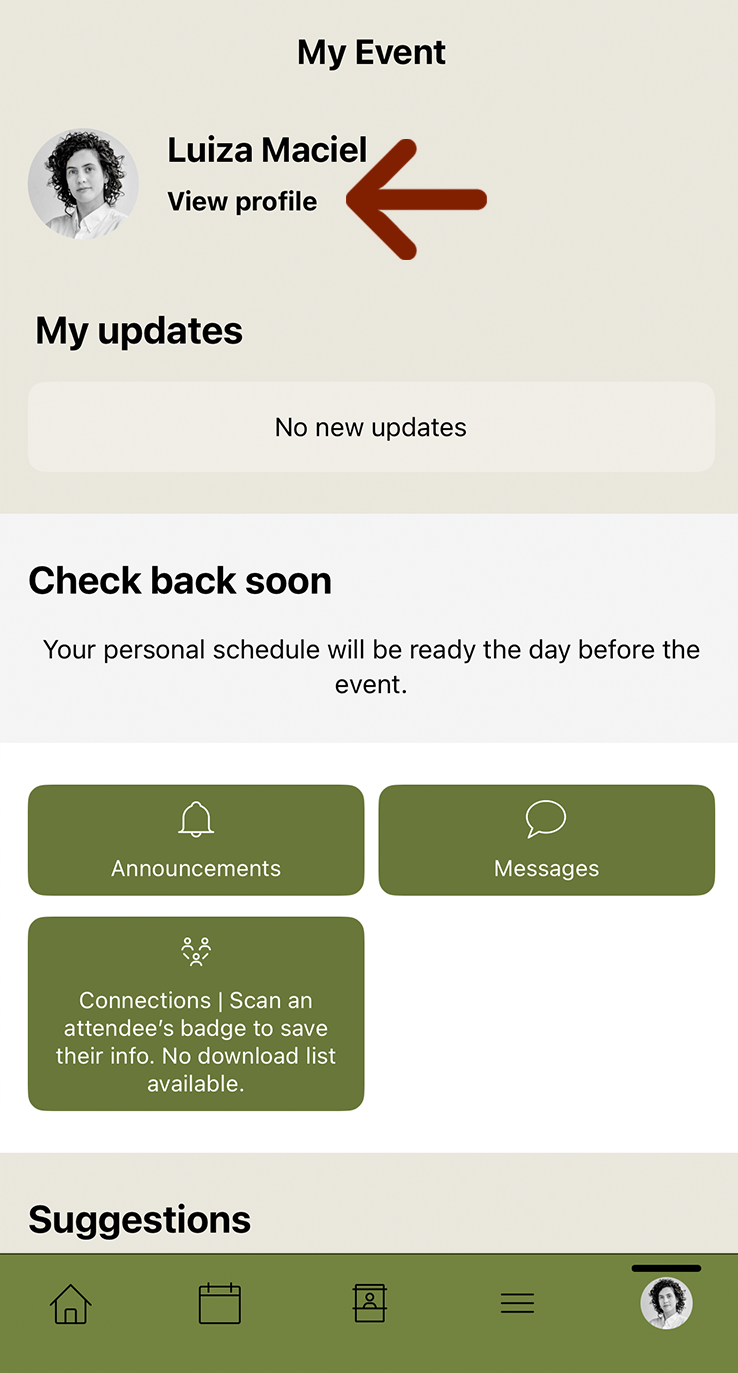
Then, click on ‘View Profile’.
4.3
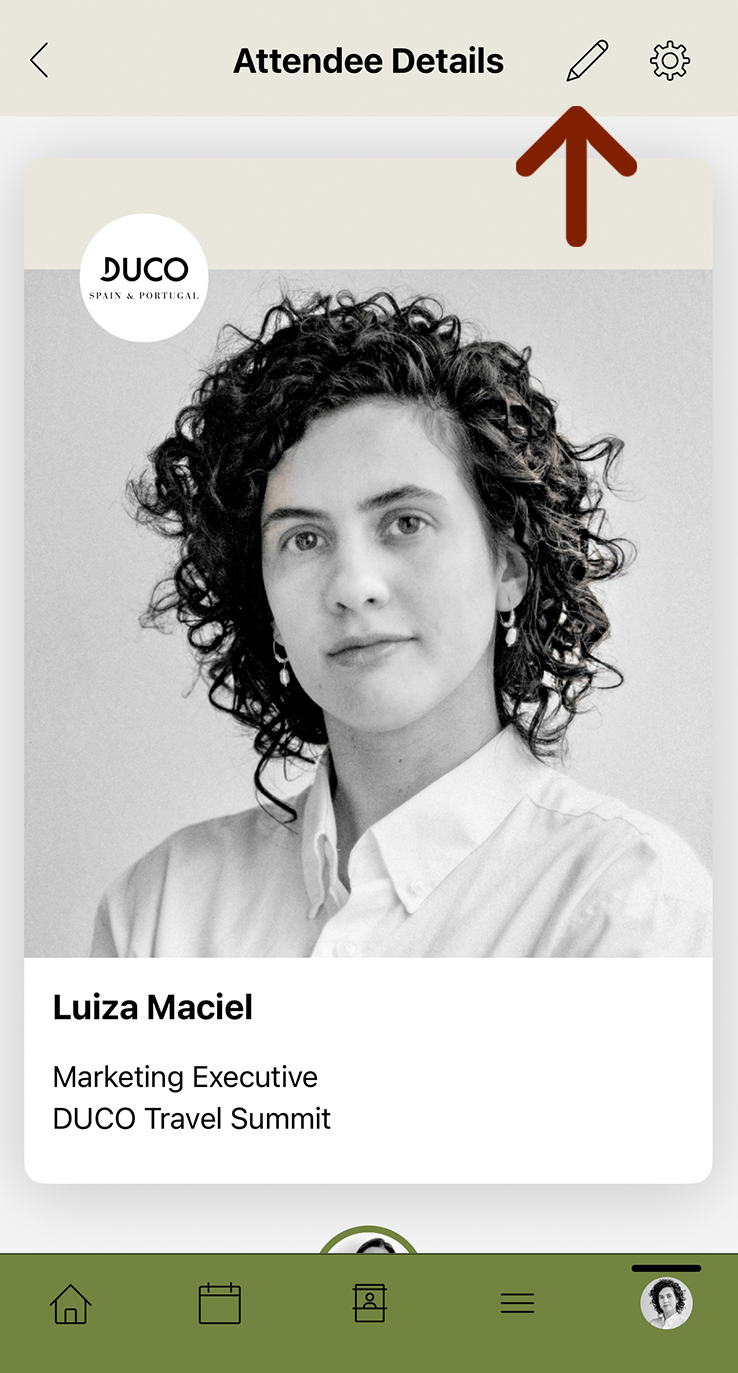
Then, click on the pencil icon at the top of the screen.
4.4
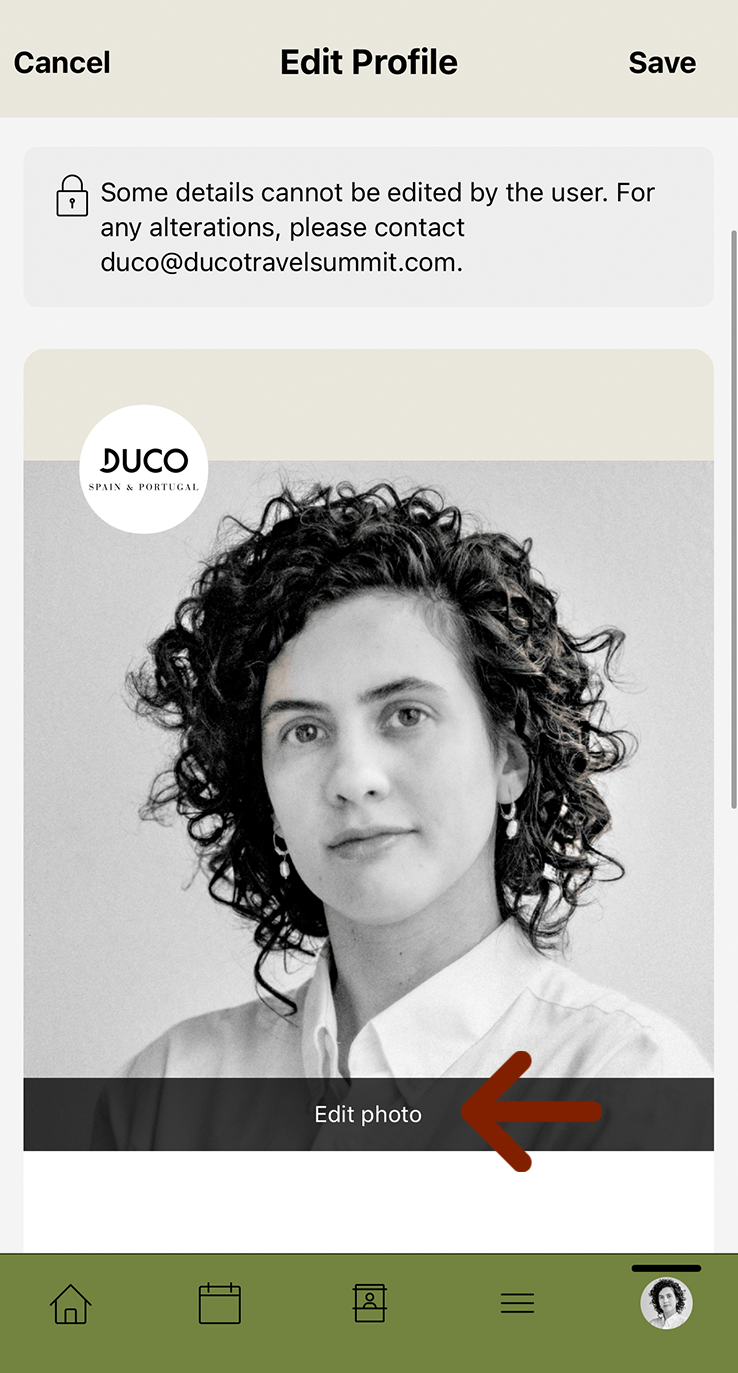
To change your profile picture, click on ’Edit Photo’. You will be given the option to take a new photo or choose one from your mobile device.
4.5
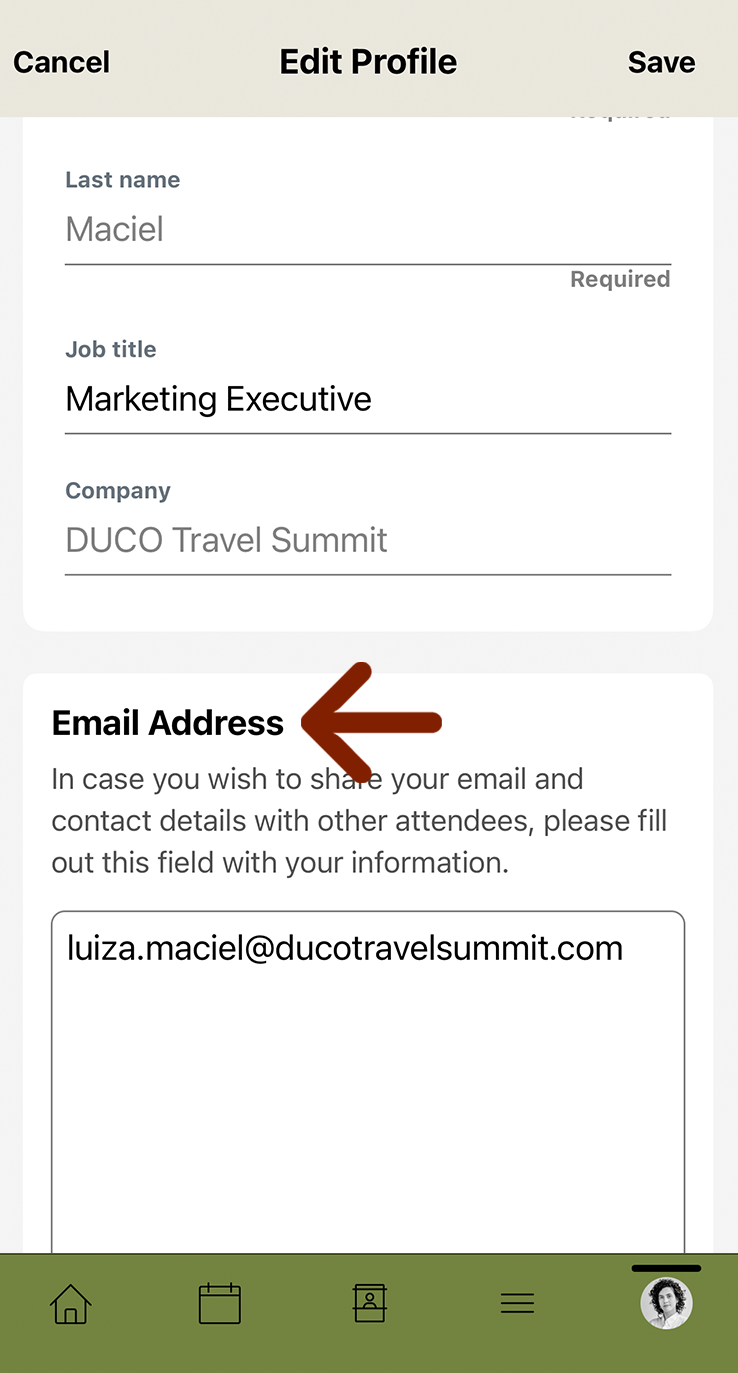
After changing your profile picture, scroll down in the same section.
You will find the ‘Email Address’ field where you can add or update your email to share your contact with other event attendees.
Once finalized, click on ‘Save’ at the top of the screen to confirm the changes.
5. View Event Program
5.1
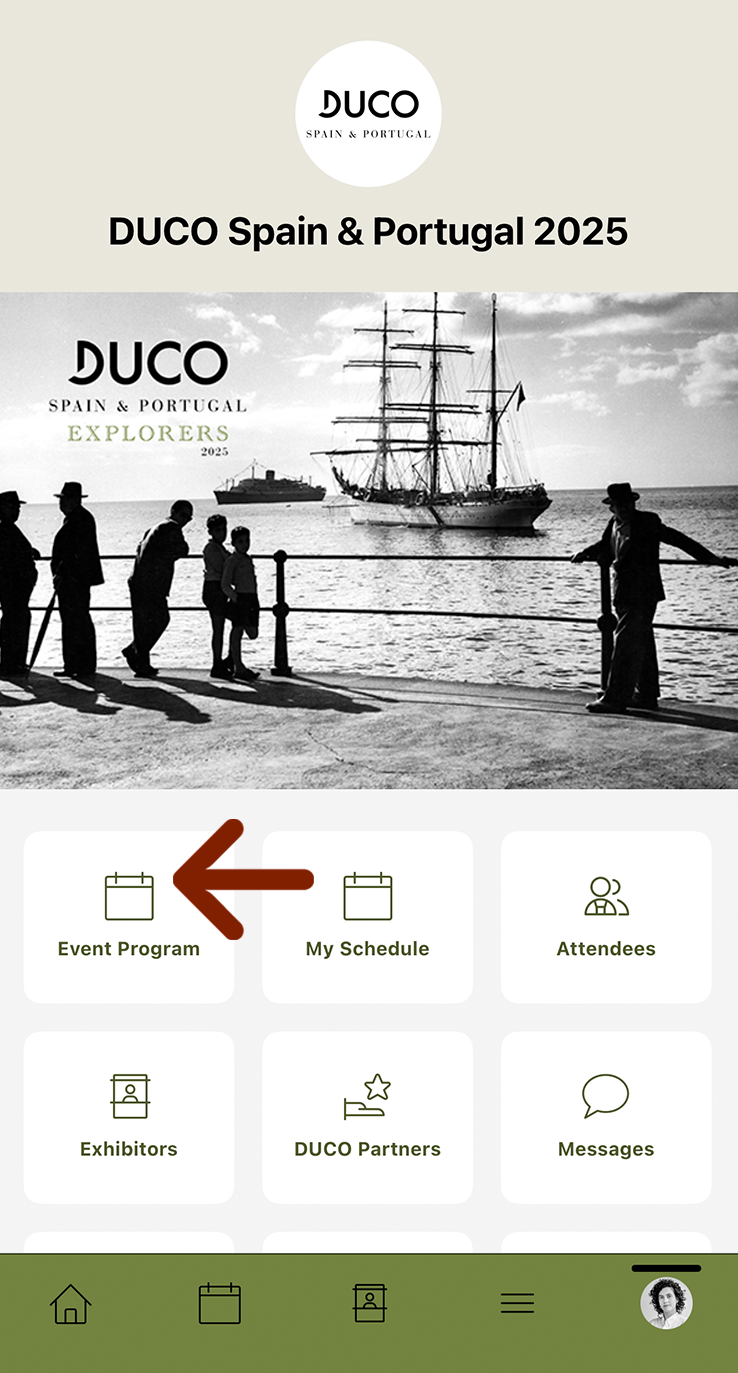
Click on ‘Event Program’ on your homescreen.
5.2
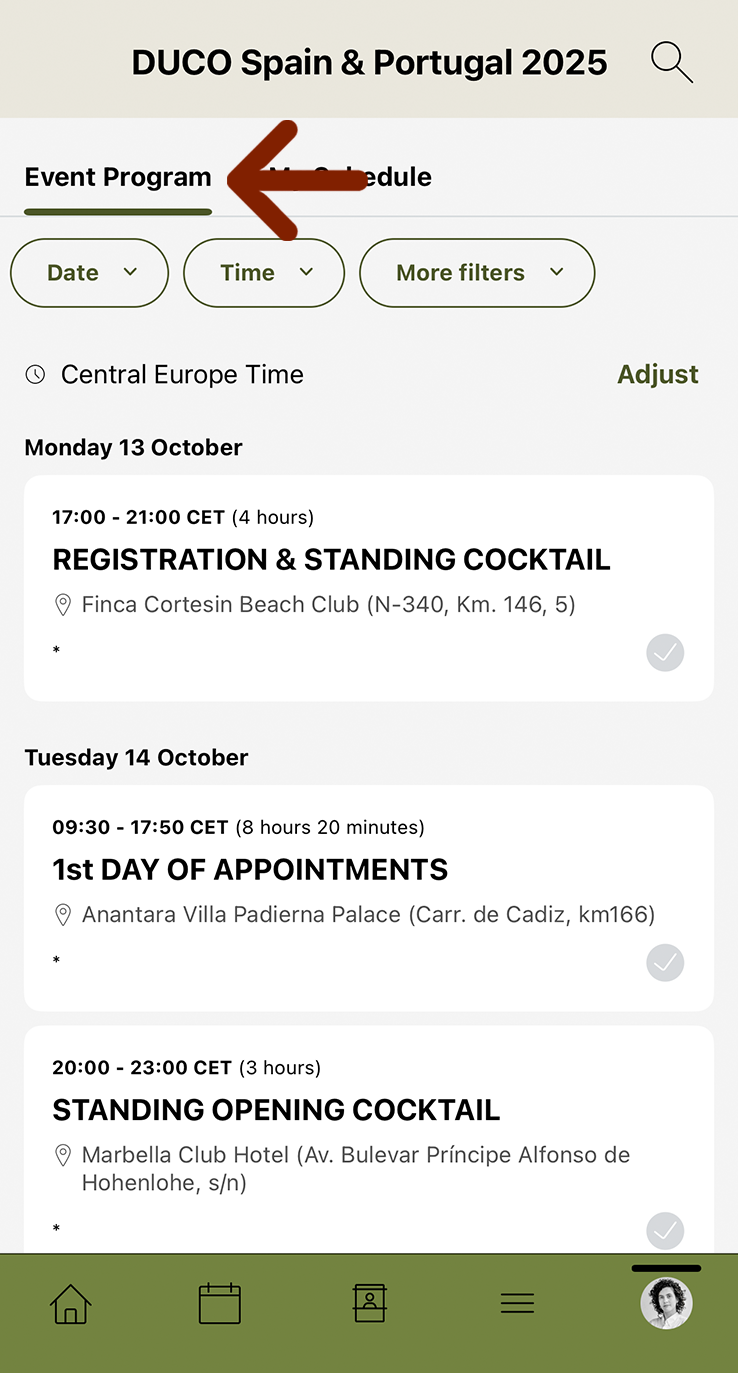
On the ‘Event Program’ page, you will find the general program for each day of the event.
Important: For your personal Agenda of Appointments, please refer to “Item 6” of this page.
5.3
At ‘My Schedule,’ you will see your individual schedule. Here, you will find personal information such as your allocated venue of appointment and agenda.
Important: please note that you cannot switch or add events to your personal agenda.
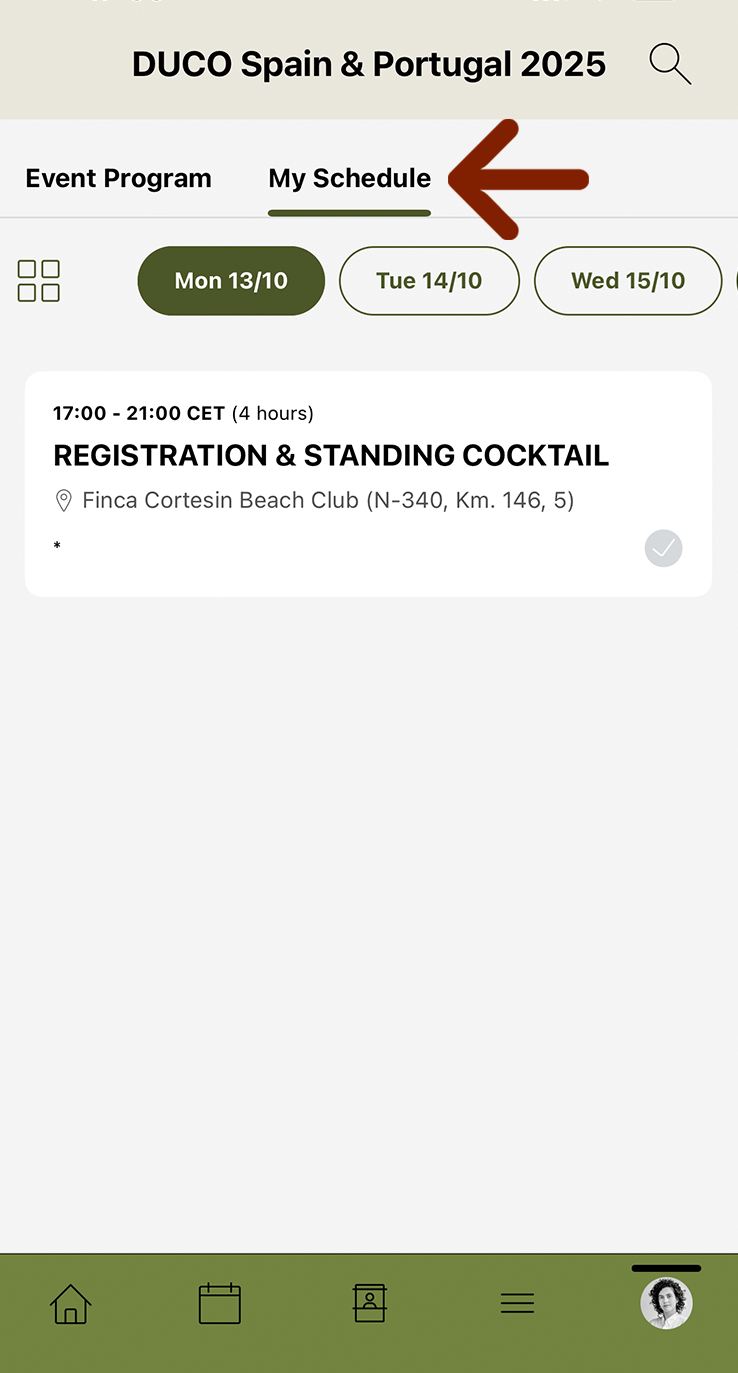
5.4
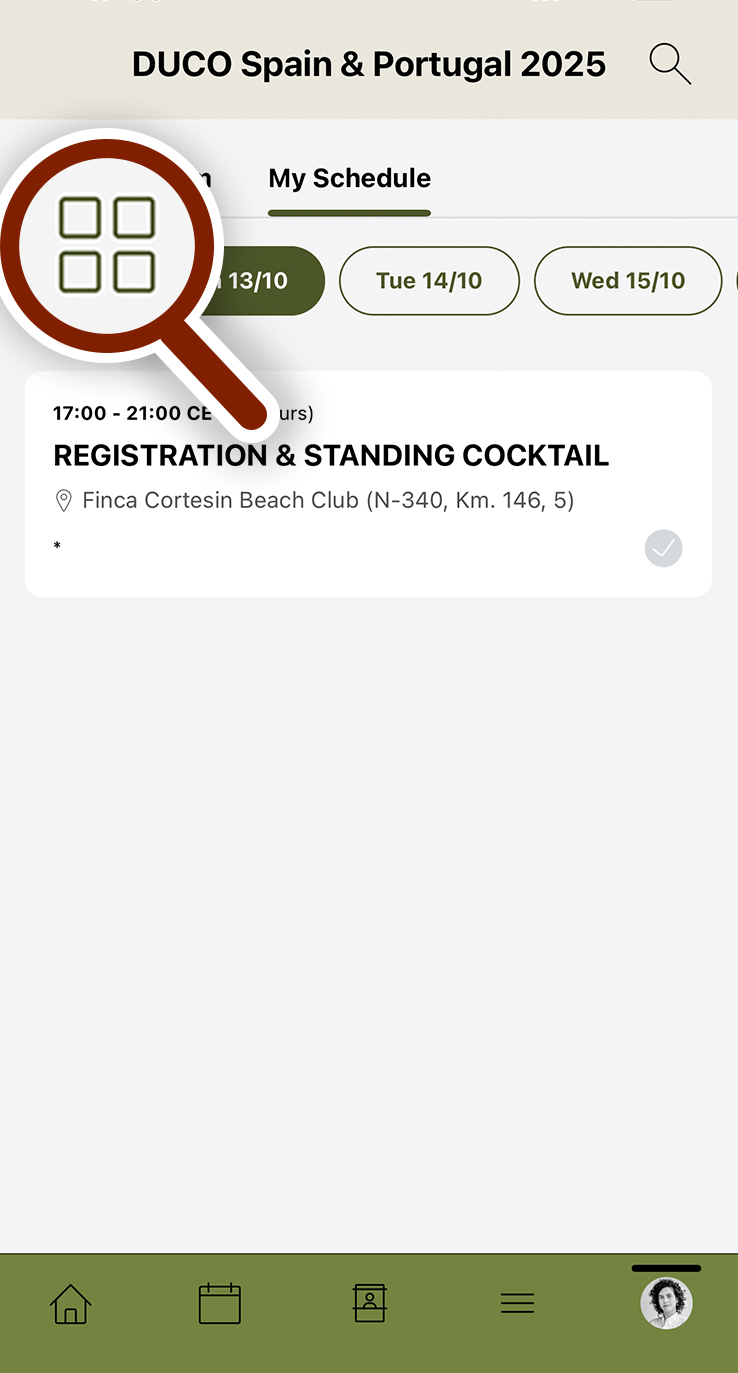
For an optimal navigation experience in the “My Schedule” feature, be sure to select the ‘List View’ (represented by the icon with four squares) instead of the ‘Calendar View’ (represented by the bullet points icon).
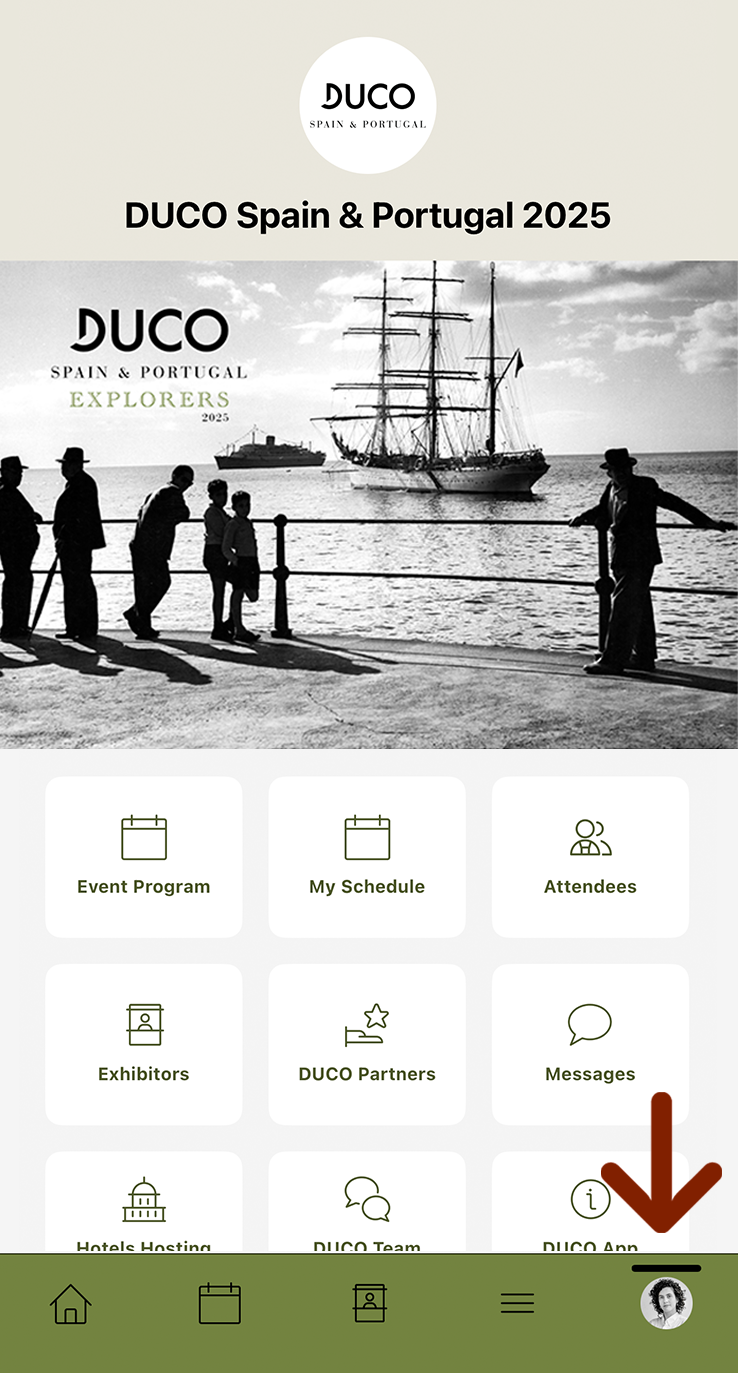
6. Access your Agenda of Appointments
6.1
To access your Agenda of Appointments, first click on your profile icon on the home screen.
6.2
Then, click on ‘View Profile.’
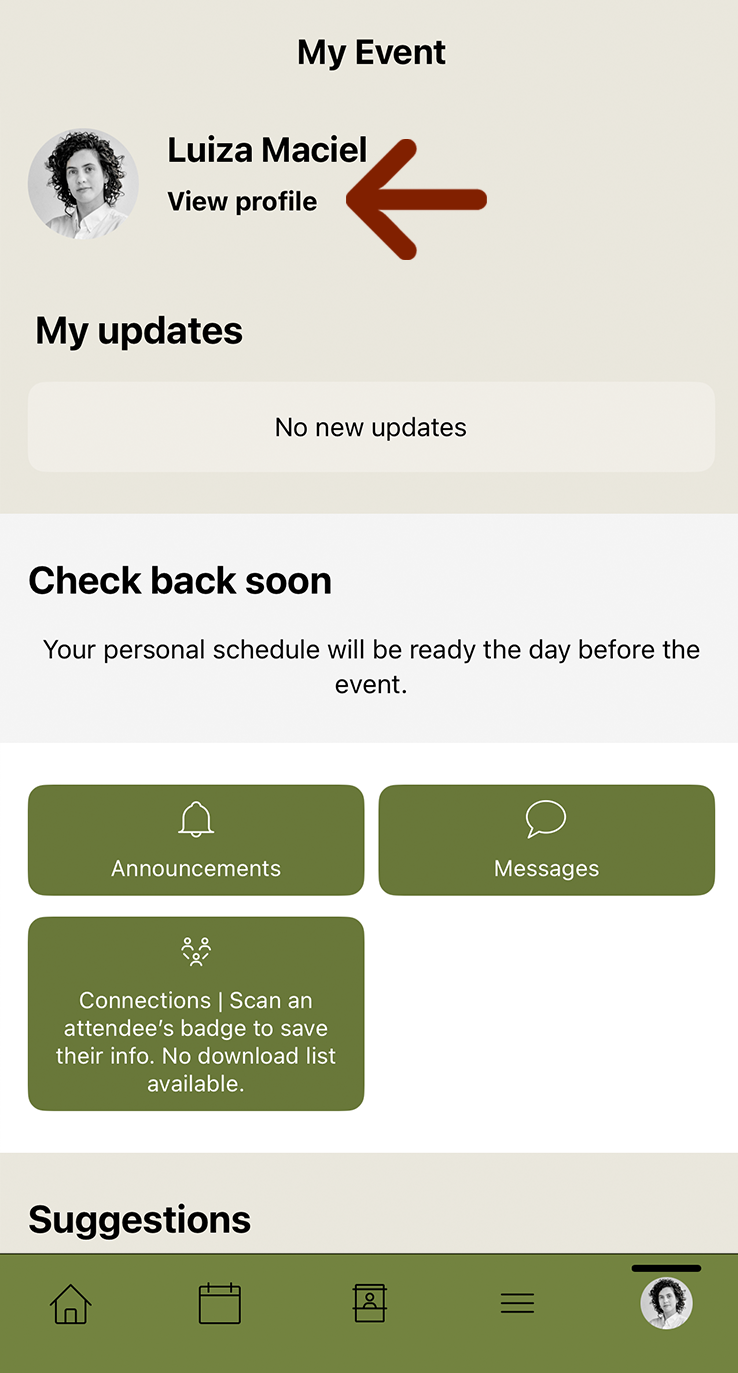
6.3
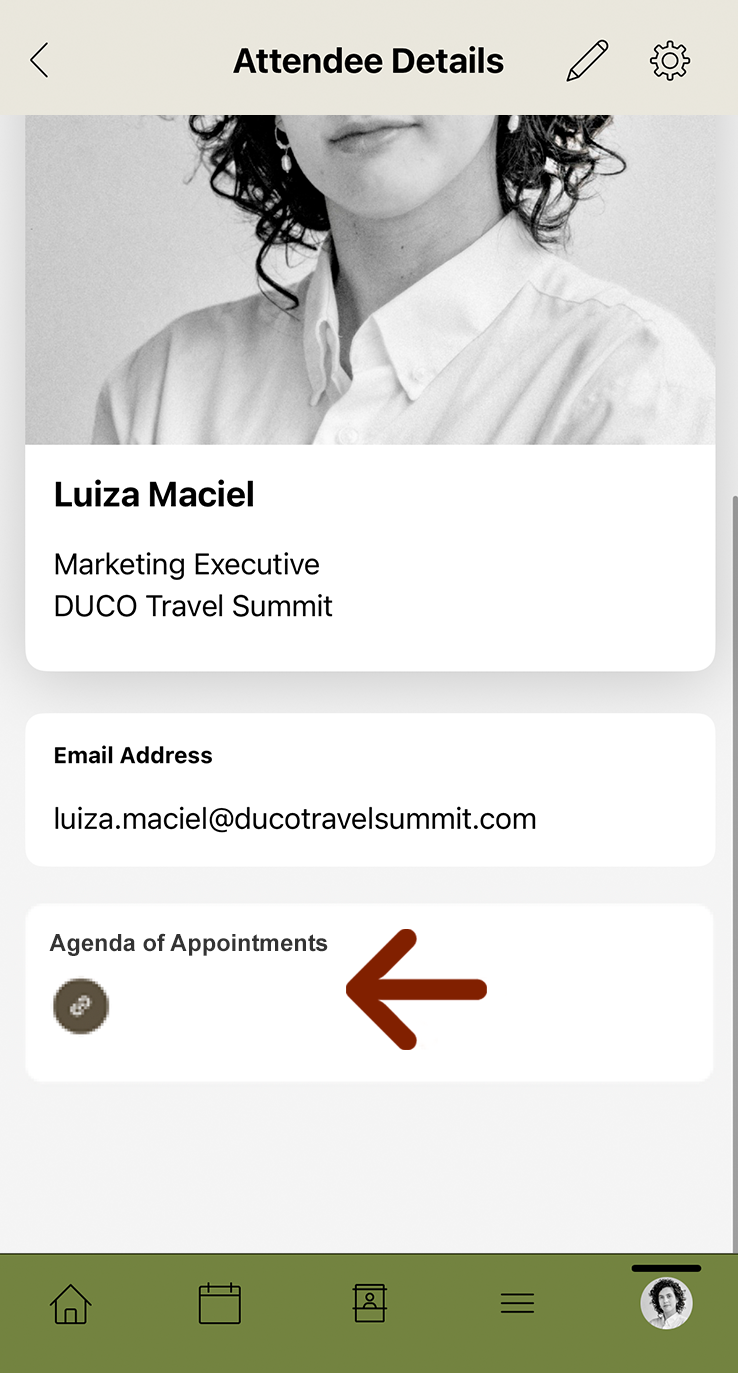
The link to access your Agenda of Appointments will be available at the bottom of the page.
7. Connect to a participant and chat
7.1
Through the DUCO App, you will be able to connect with attendees and chat.
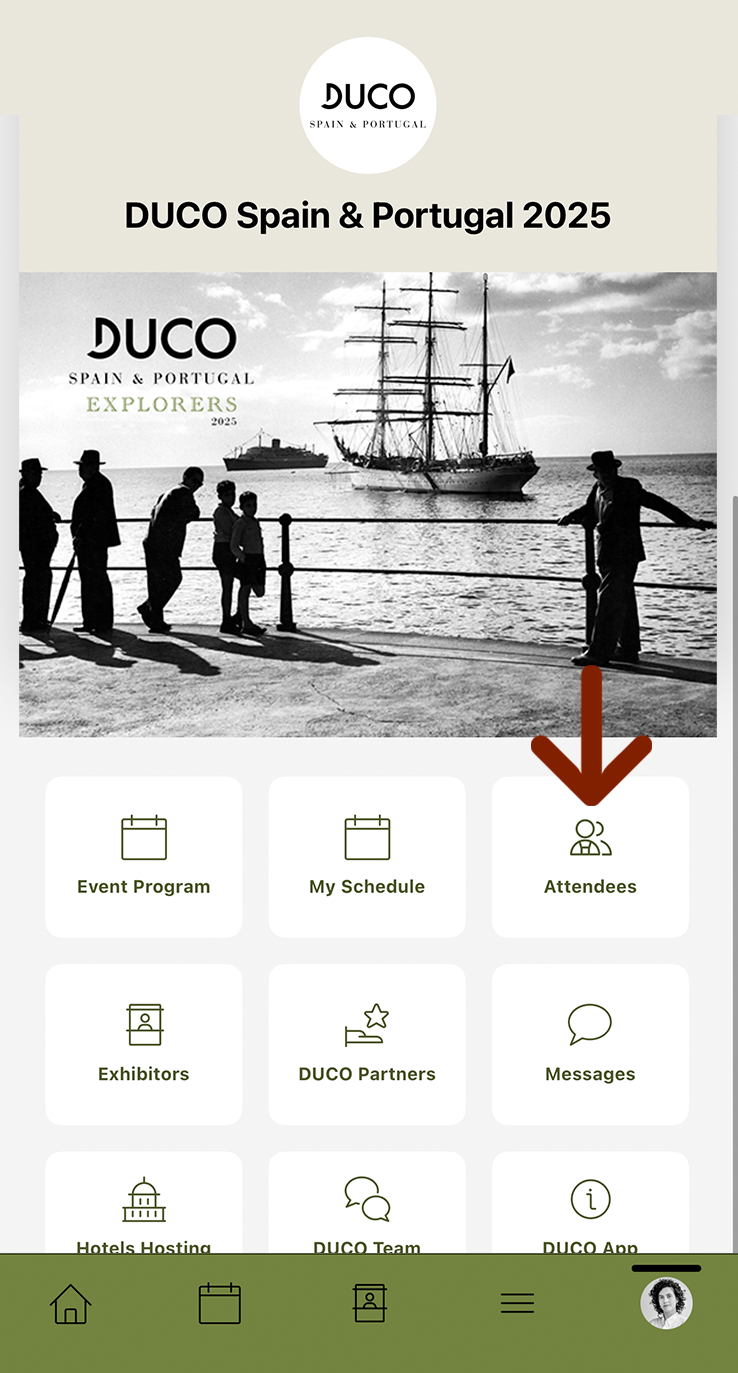
To see all event attendees, click on ‘Attendees’ on your home screen.
7.2
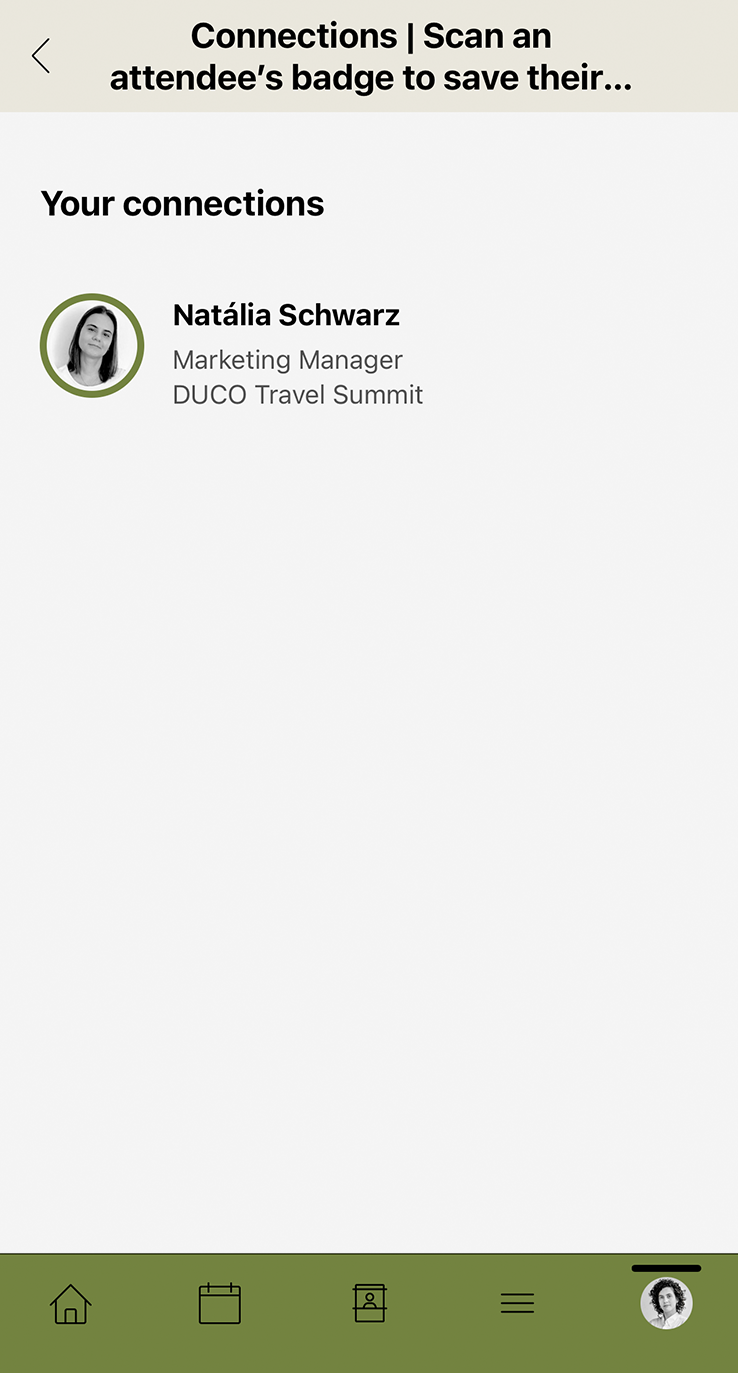
After clicking, a list of attendees will appear. Simply click on the name of the person you wish to connect with to send the invitation request.
Note: the profiles with a green circle highlighted are the ones you are already connected with; those without that circle indicate that you are not connected.
7.3
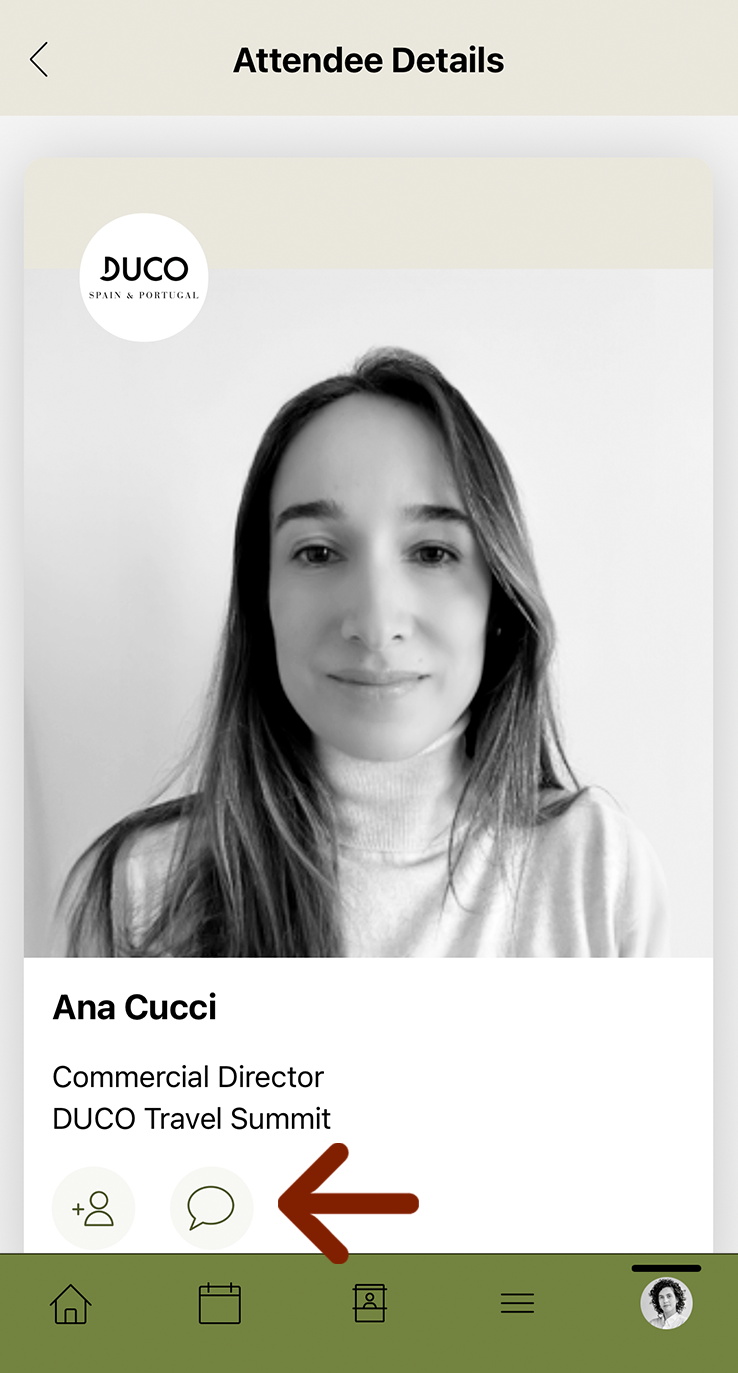
To connect, click on the icon:
![]()
To chat, click on the icon:
![]()
7.4
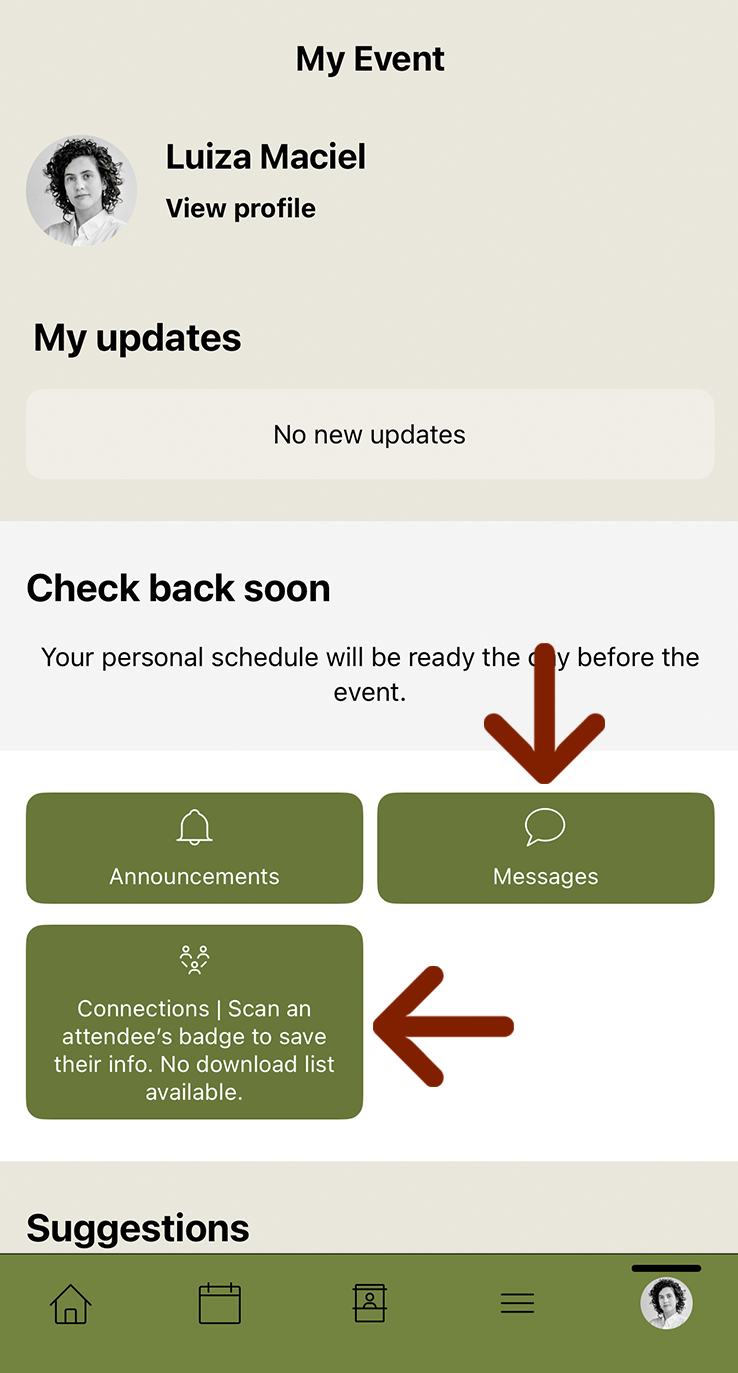
To see all messages and connections, click on your profile icon on the home screen, then select ‘Messages’ or ‘Connections’.
8. And more...
8.1
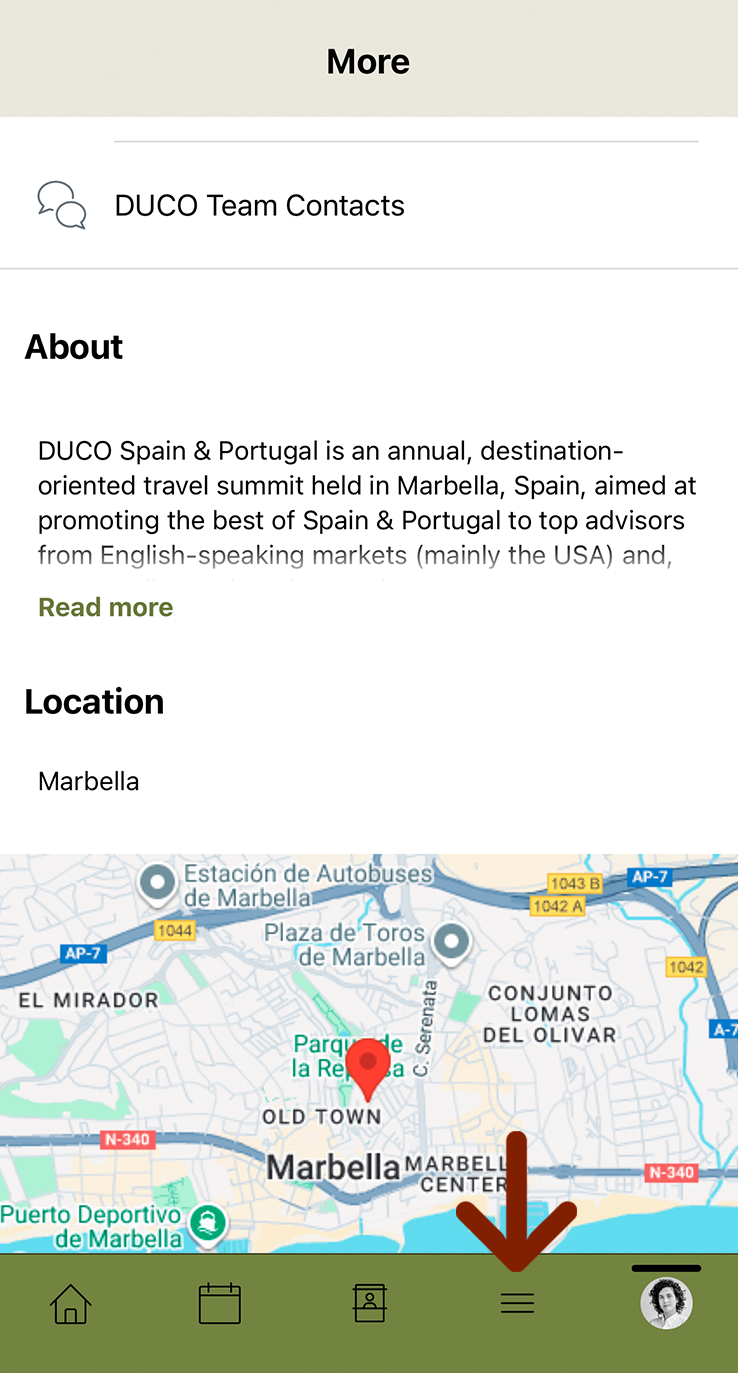
For more information, click on the three lines in the navigation bar to access more options, including the DUCO Guía, your pocket guide to everything DUCO.
